

The AI Dashboard Playbook
How to build a specialized AI app in 10 hours that solves real problems


I built an AI-powered dashboard in 10 hours that takes students from zero to a complete business launch.
Landing page copy.
VSL scripts.
Offer creation.
Cold emails.
All automated.
And I’m going to show you exactly how to build one yourself.
No coding experience required.
No massive budget.
Just the right process and tools.
If you actually follow this, you can build a SaaS in a few hours a week.
Currently I have 300+ users accessing this dashboard every day with zero issues.
Imagine if you had 300+ SaaS users after 10 hours of work.
This is the ONLY playbook you need to ship fast and build something useful.
What We’re Building
Before we start, here’s what the end result looks like.
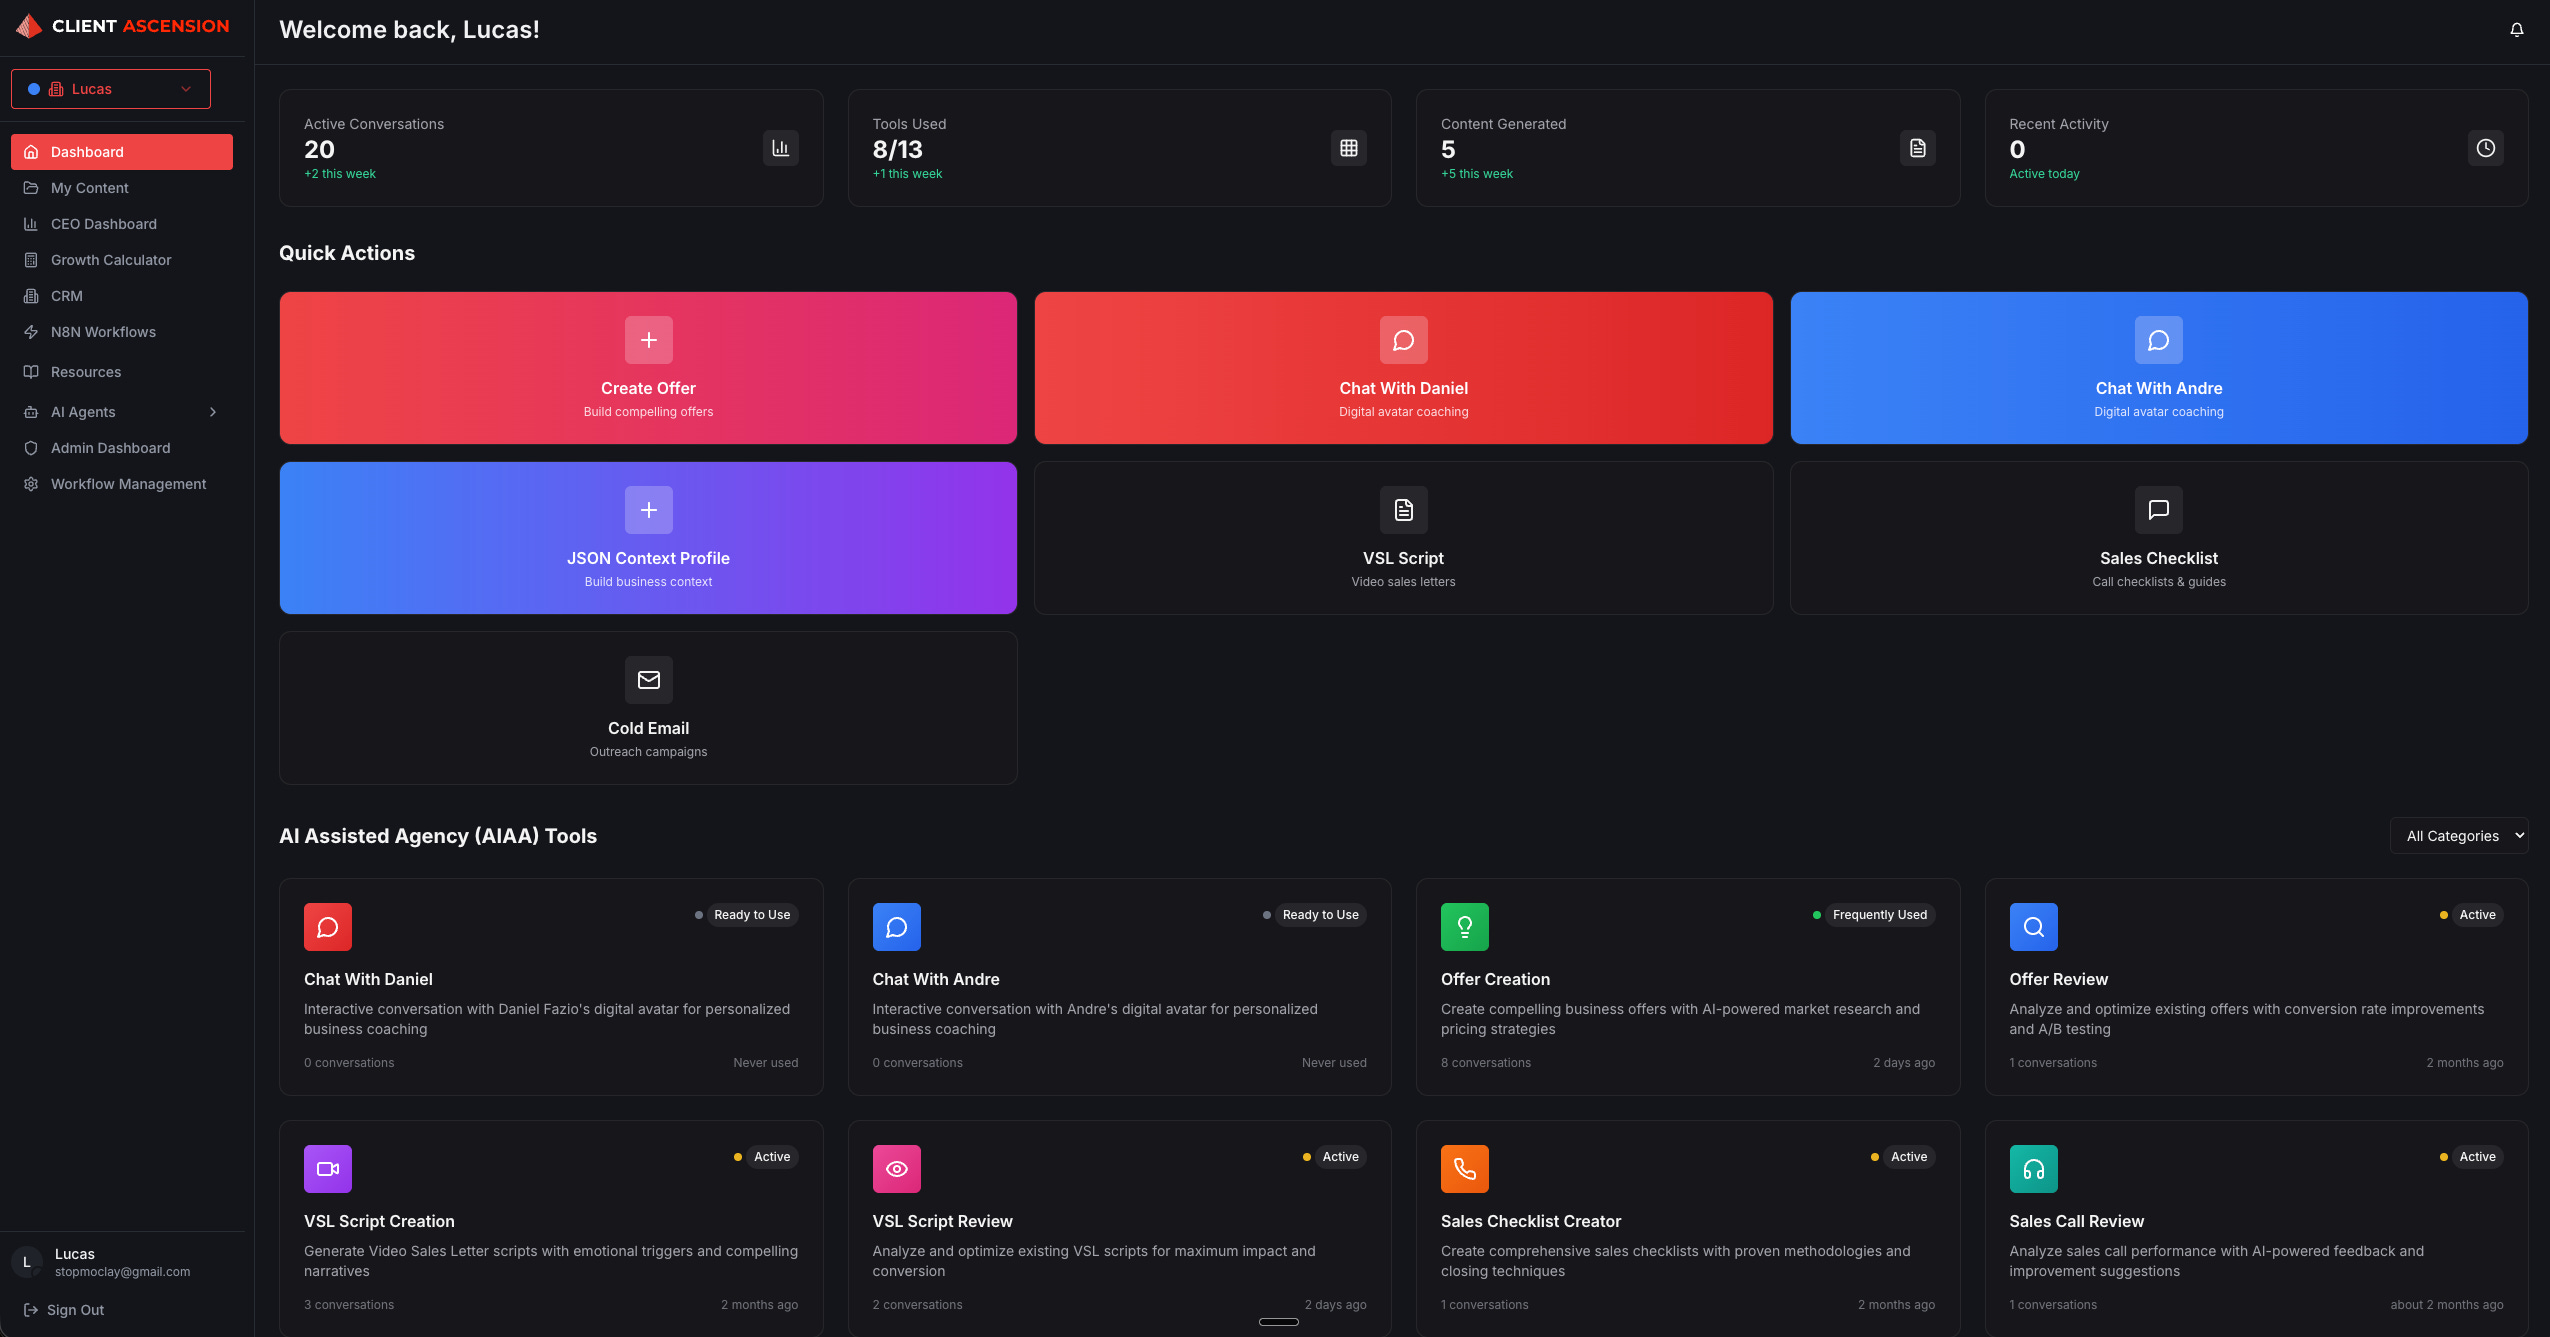
This is a fully functional AI dashboard with:
12 specialized AI modules (Offer Creator, VSL Writer, Cold Email Generator, etc.)
A chat interface that saves conversation history
A content library where users can save their outputs
A JSON context builder so users don’t repeat themselves
Authentication and whitelist system for access control
AI Clones of Daniel Fazio and Andre Haykal Jr., my co-founders
By the end of this tutorial, you’ll know how to build your own version of this for whatever use case you need.
Step 1: Define Your Deliverables
Don’t start building until you know exactly what you’re building.
I opened a notebook and wrote down every deliverable our students needed to launch their business:
Landing page copy
Offer development
VSL script
Cold email sequences
Sales checklist
Hiring scorecard
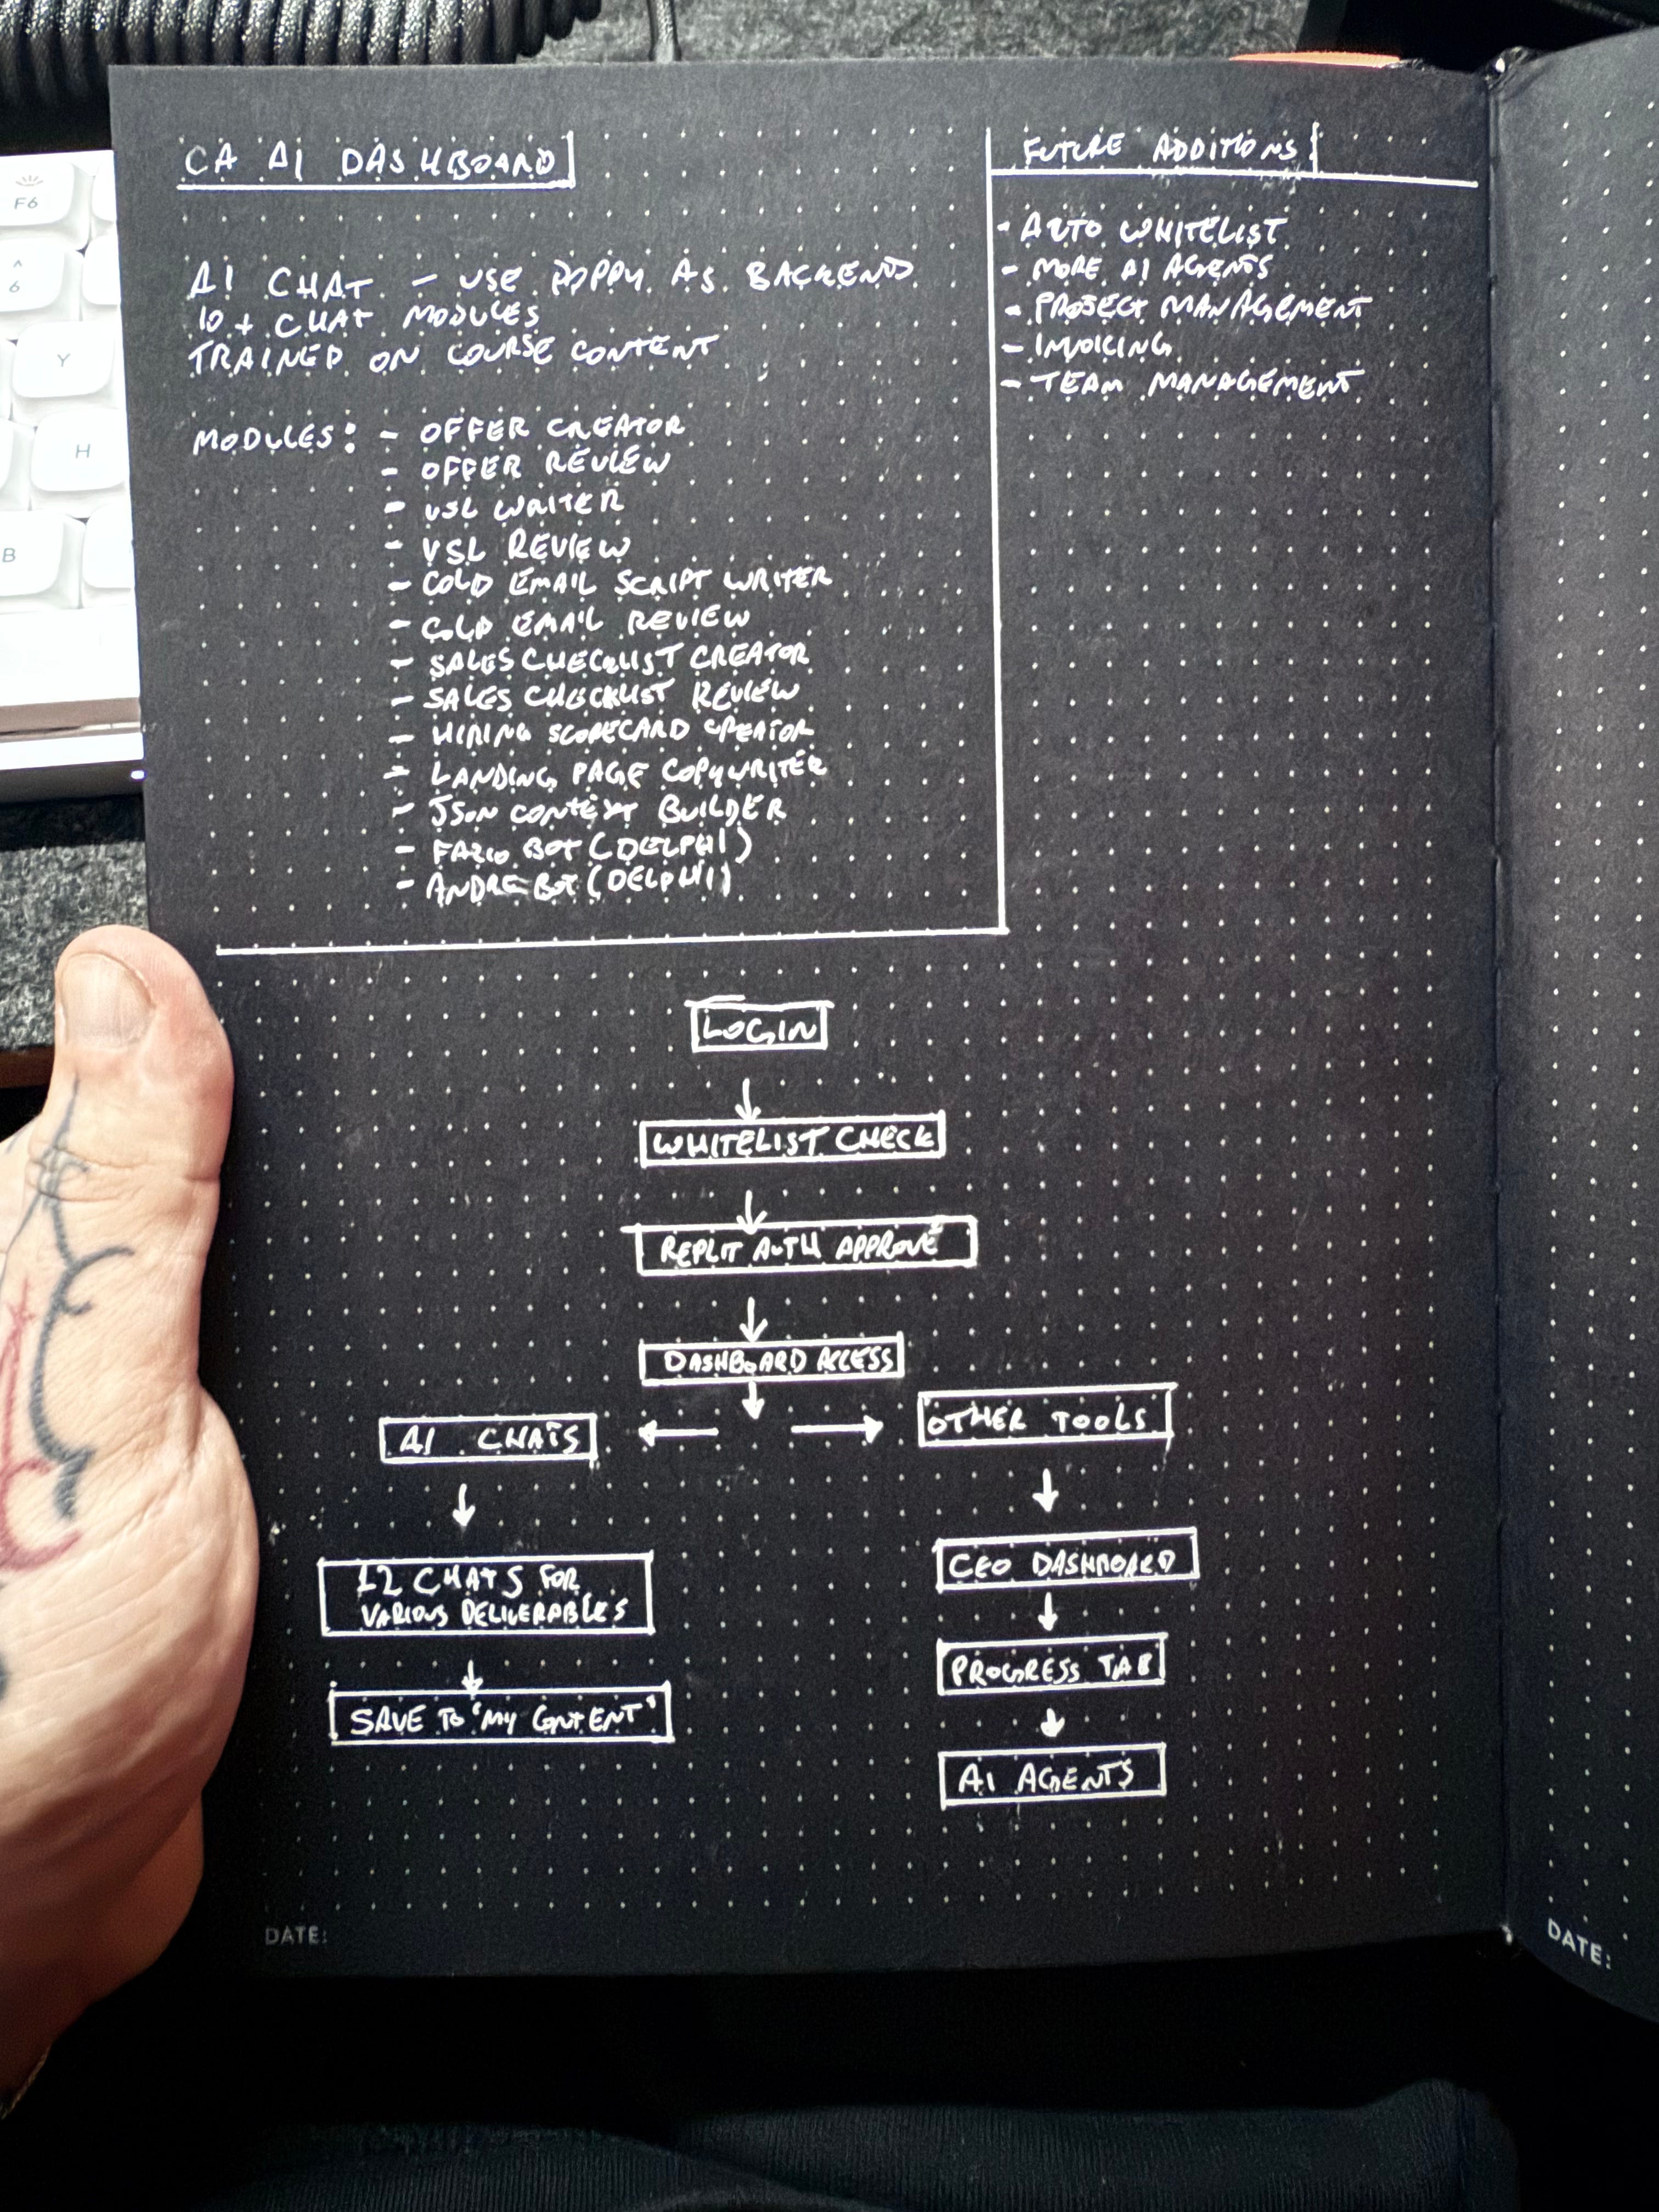
This doesn’t have to be super detailed.
Just a general idea of what you want the app to do and how it operates.
Your list will be different to mine.
Maybe you’re building a dashboard for:
Content creators who need posts, scripts, and captions
Agencies who need proposals, reports, and strategy docs
Consultants who need frameworks, audits, and recommendations
Write down 6-12 specific outputs your users need.
That’s your roadmap.
Step 2: Make AI App Builders Compete
I didn’t pick a tool and hope it would work.
I made three AI app builders compete for the job: Bolt, Lovable, and Replit.
Here’s what I did:
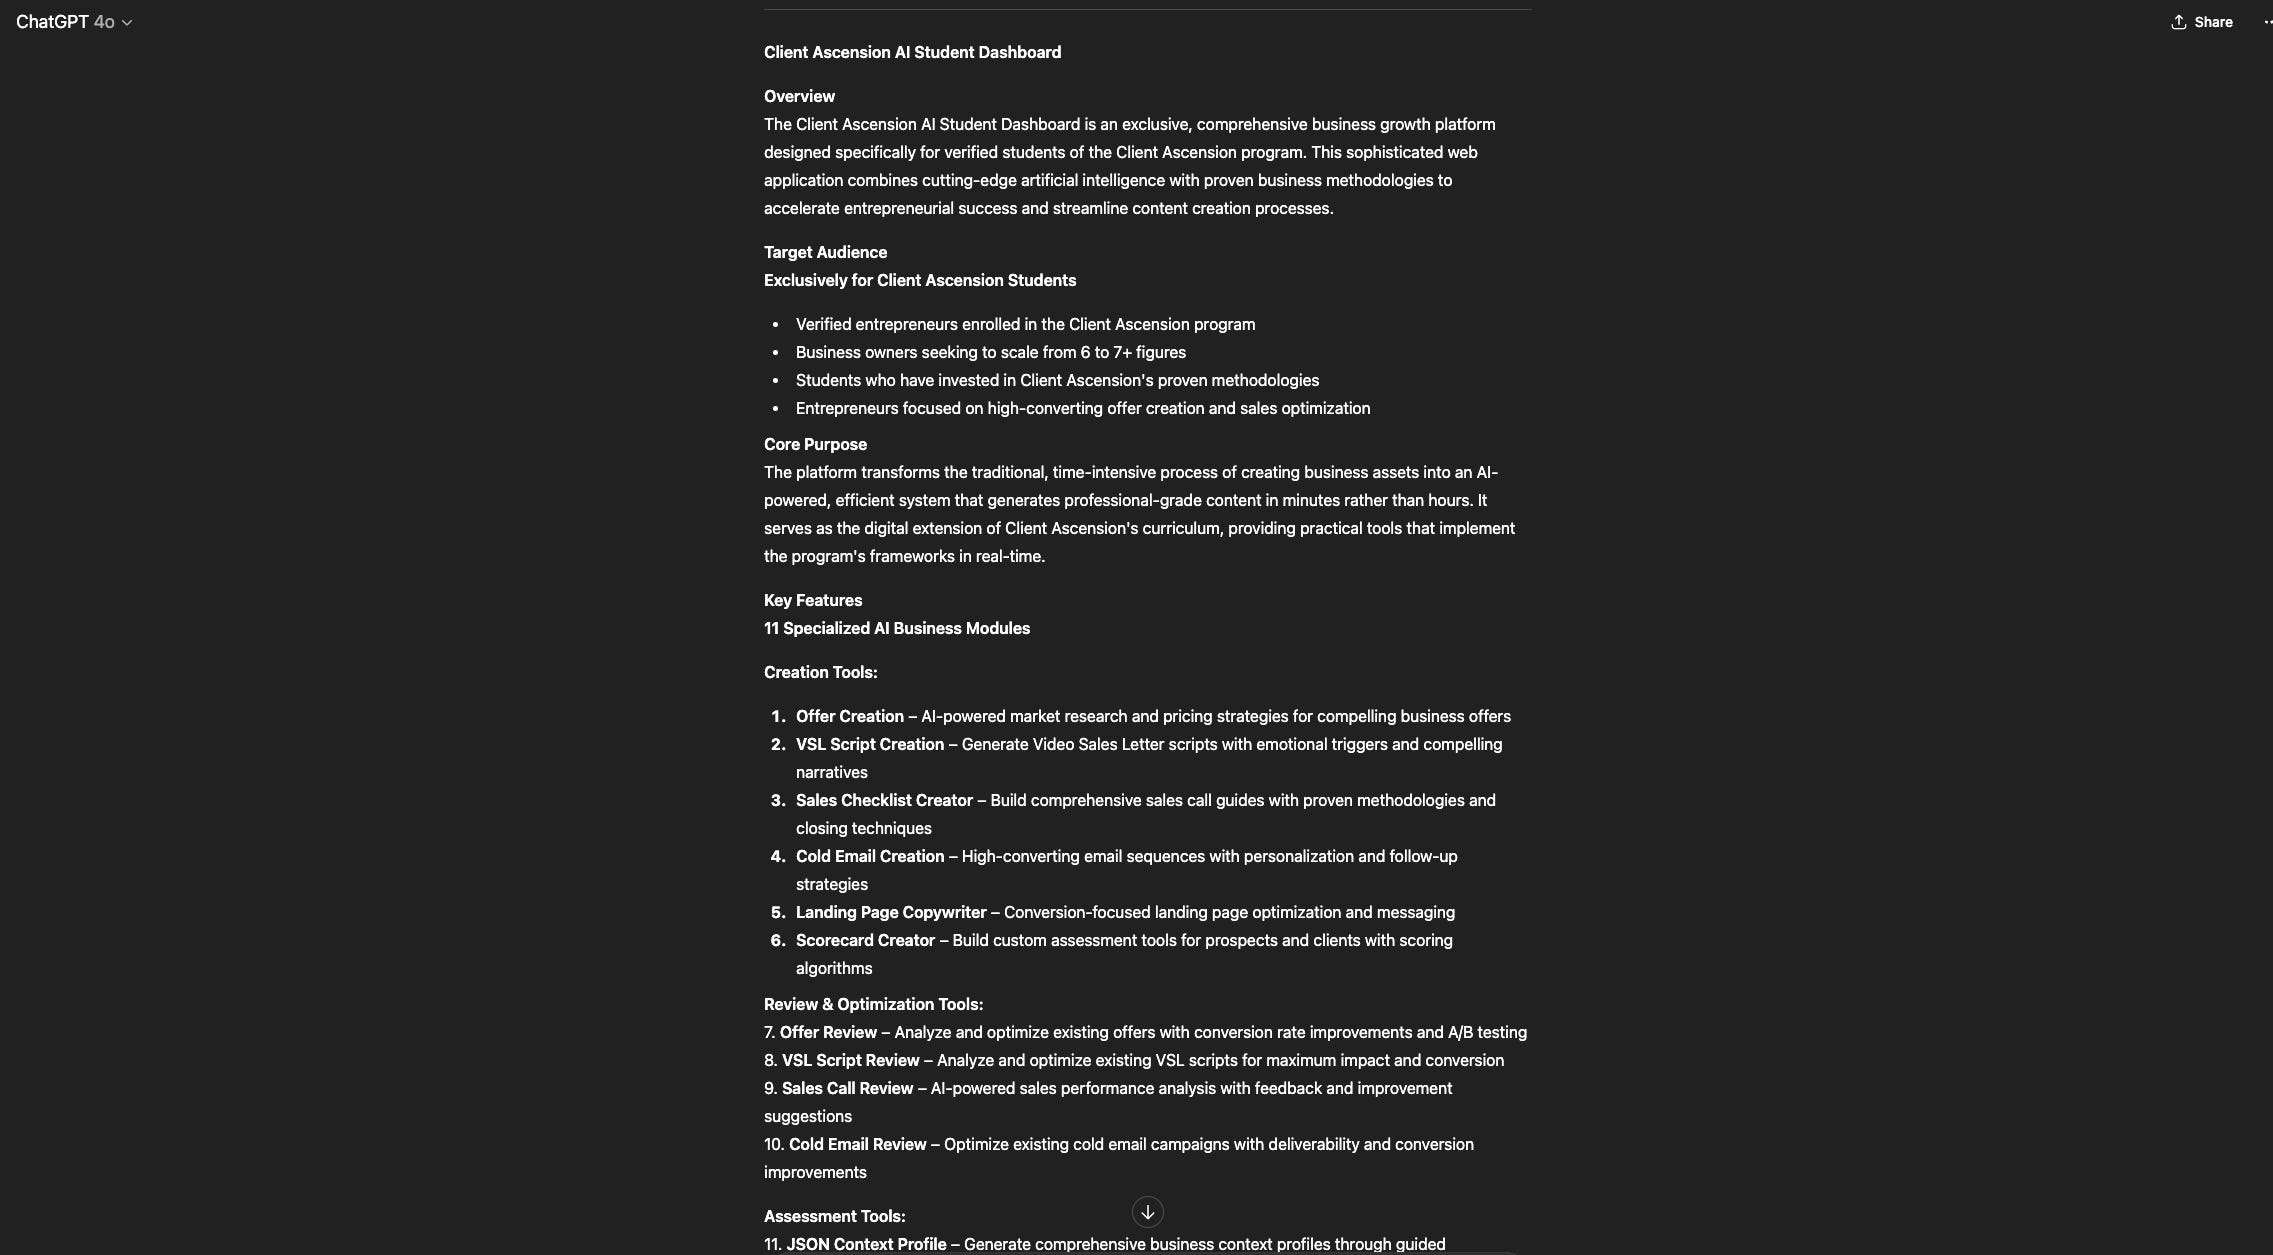
First, I used ChatGPT to write my prompt.
I described what I wanted to build and asked ChatGPT to create a detailed prompt for an AI app builder.
This gave me a solid foundation instead of winging it.
Here’s your prompt template:
Build a complete app that [MAIN PURPOSE OF APP]
requirements:
include the following core features:
[feature 1]
[feature 2]
[feature 3]
use the attached image / description as the visual design reference. match layout, color scheme, and general ui feel.
implement a fully functional authentication system (signup, login, forgot password).
choose the most efficient, modern tech stack for this use case (frameworks, languages, and libraries) — prioritize performance, scalability, and ease of deployment.
generate front-end + back-end + database structure, plus api endpoints if needed.
automatically handle routing, state management, and responsive design.
explain any key implementation decisions in brief comments or notes.
I fed that same prompt to all three app builders.
I wanted to see:
Which one created the best initial layout
Which one had the features I needed
Which one would be easiest to iterate on
Lovable Output:
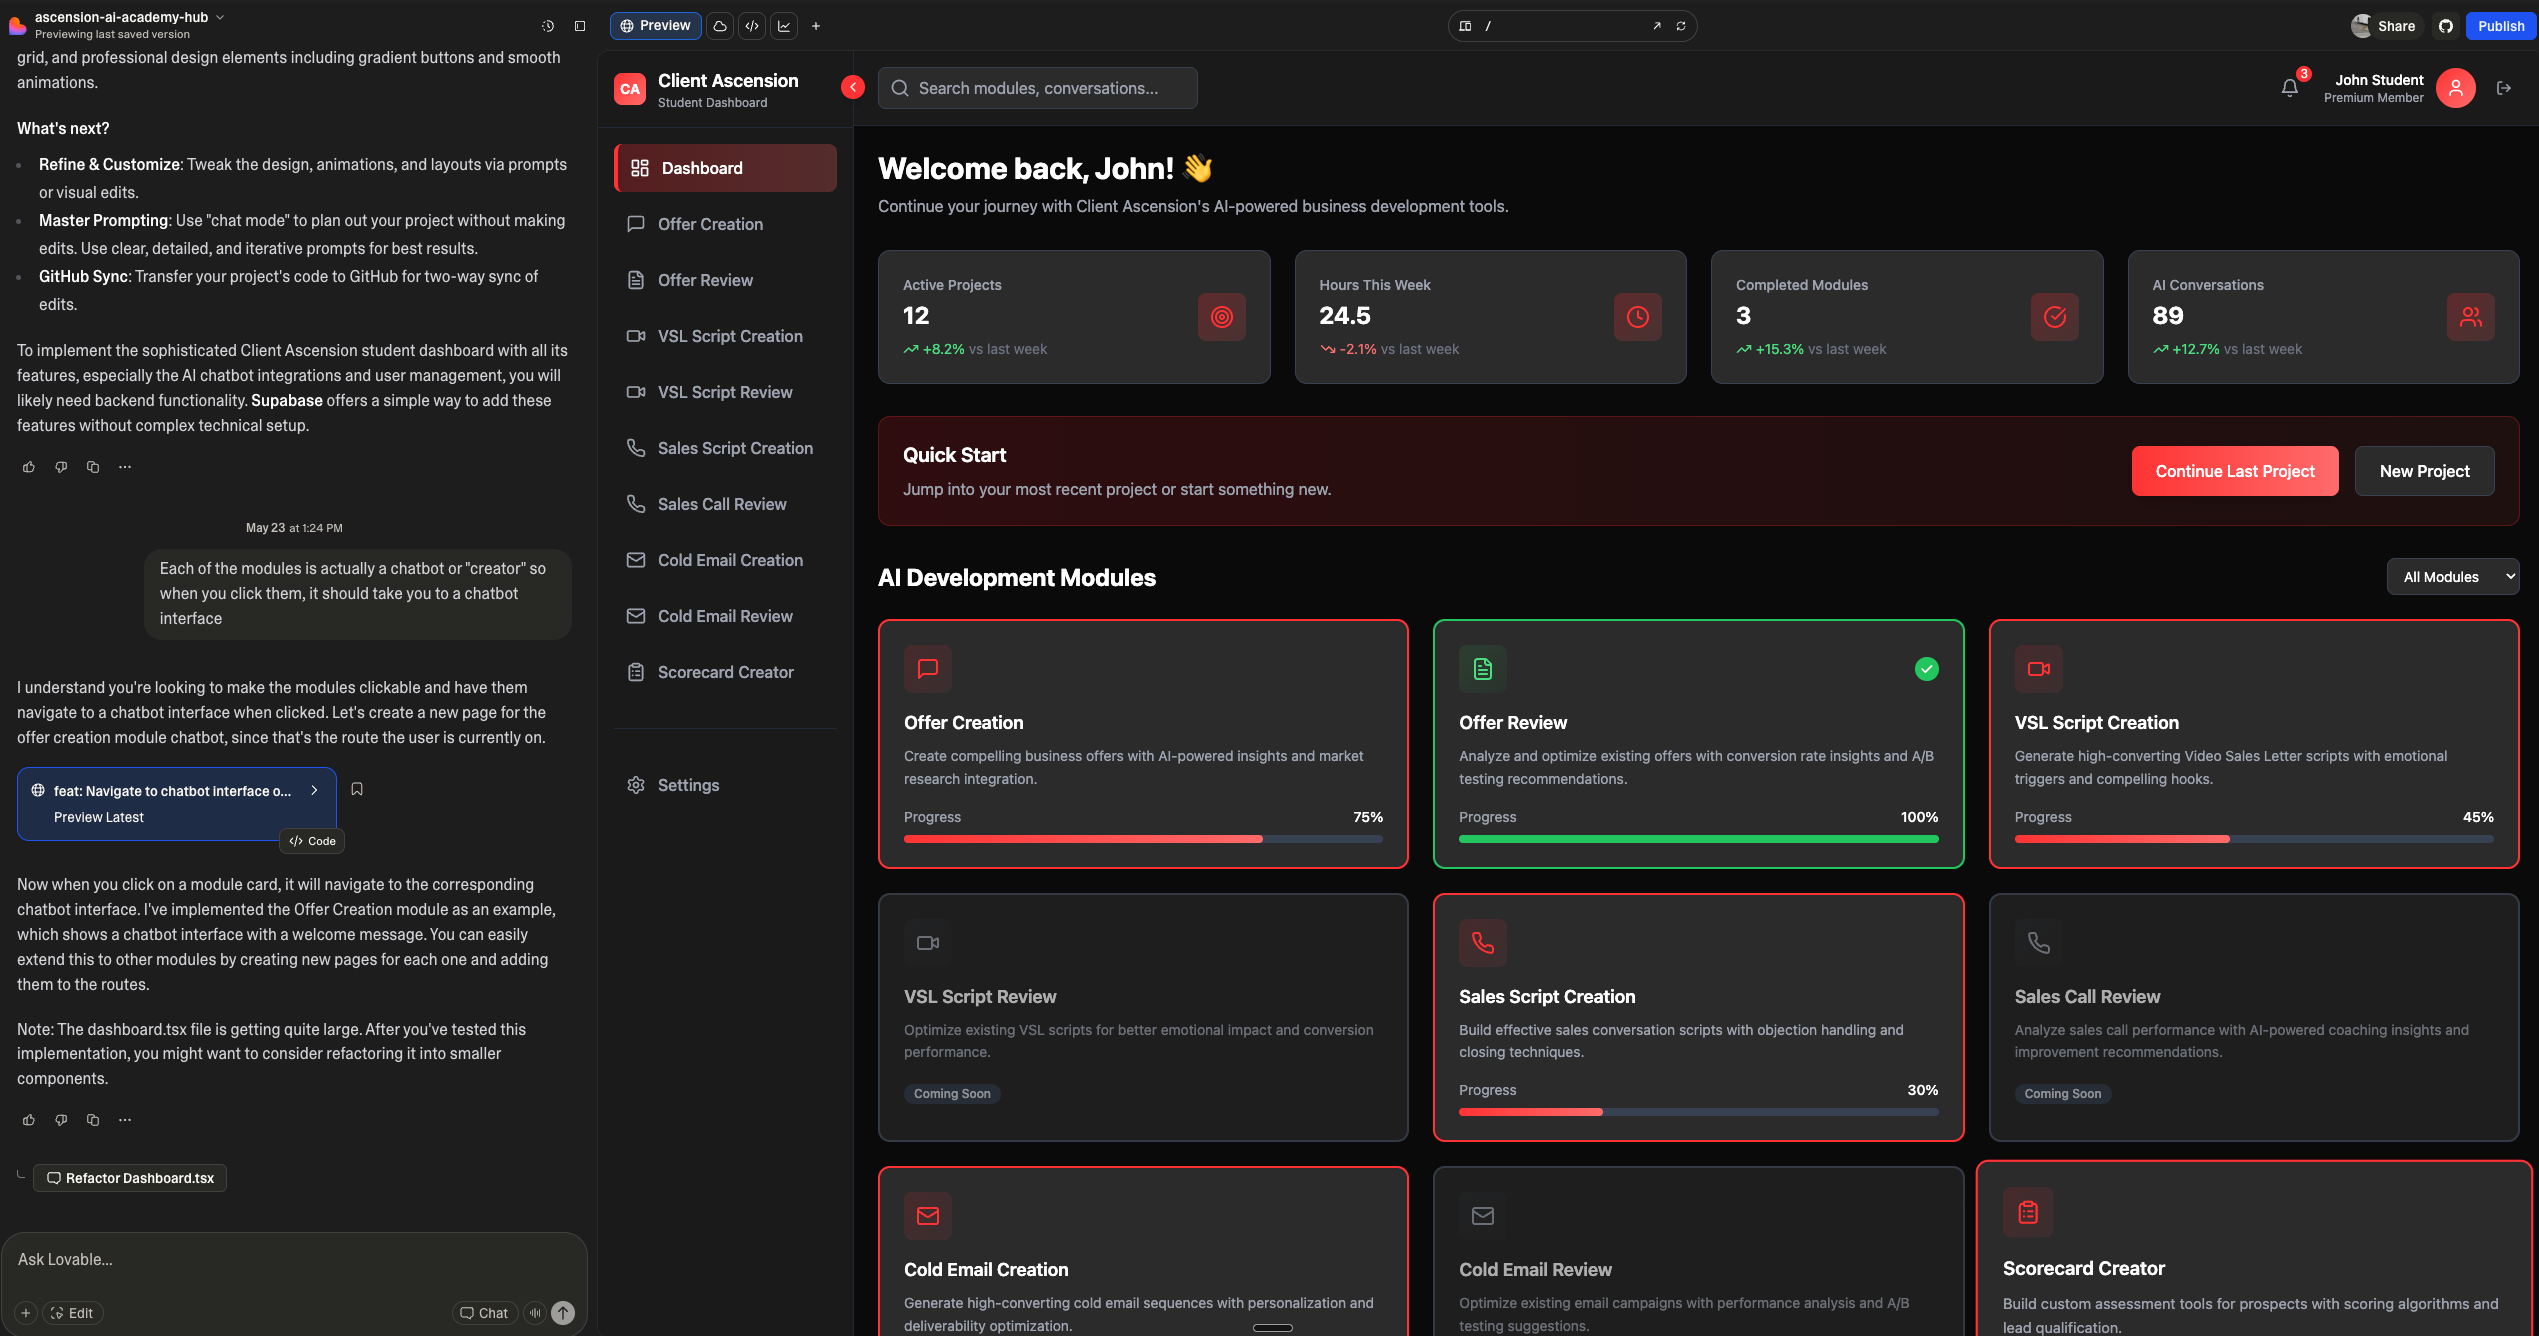
Bolt Output:

Replit won.
It created the cleanest layout and was the only one with built-in databases and authentication.
The others needed external services like Supabase.
But here’s where it gets interesting.
Replit was perfect for the MVP.
But as the app got more complex, I needed more control.
That’s when I introduced Claude Code.
Your action: Test 2-3 AI app builders with the same prompt. Pick the one that gets closest to your vision on the first try.
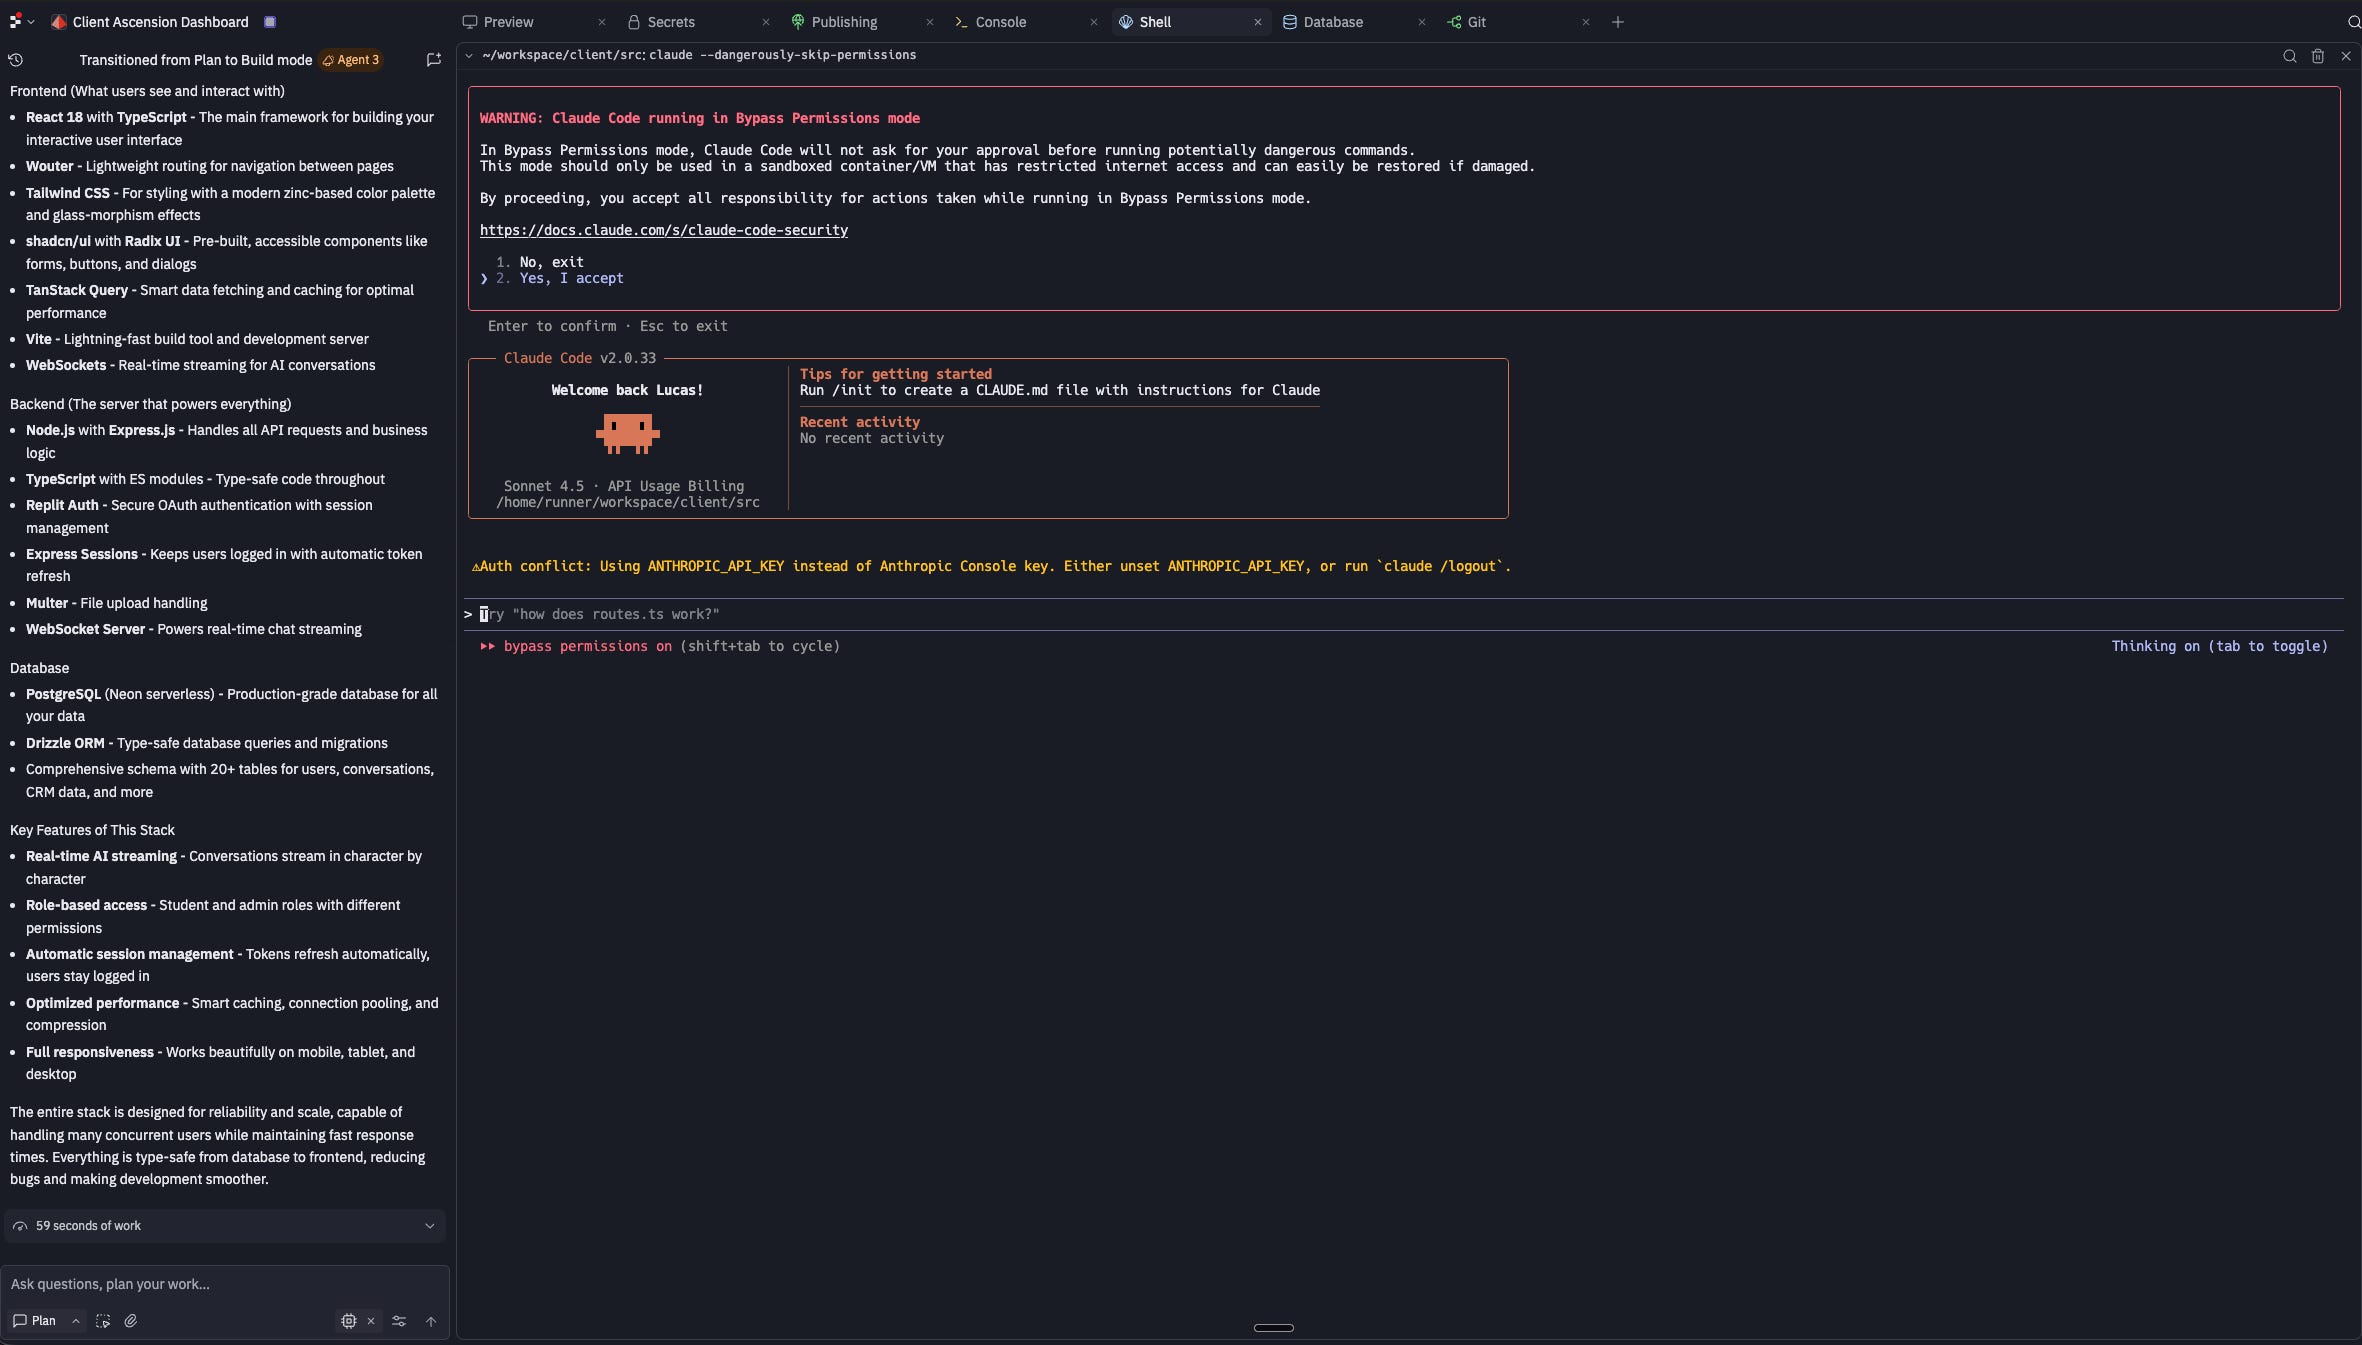
Step 2.5: Level Up With Claude Code (Optional But Powerful)
Once the basic app was working, I hit a point where I needed more sophisticated development.
Replit’s agent is great for getting started.
But for complex features, debugging tricky issues, and having more granular control over the codebase, I switched to Claude Code.
Here’s what I did:
Replit apps run on a VPS (virtual private server). I installed Claude Code directly on that VPS.
Now I can choose:
Use Replit’s agent for quick, simple changes
Use Claude Code for complex features and debugging
Why Claude Code is better for complex work:
It understands the entire codebase context. It can work across multiple files simultaneously. It can debug issues by actually reading error logs and stack traces. It gives you more control over exactly what changes are made.
How to set this up:
Access your Replit VPS via SSH or via the Shell tab on your Replit preview
Install Claude Code on the server
In your shell run the below command
npm install -g @anthropic-ai/claude-code
Point it at your project directory
If you’re on Replit, type the below commands and hit enter after each one
cd client
cd src
If you’re not on replit type “ ls “ without quotes to see a list of folders and files in the directory
To go to your folder type
cd /FOLDER_PATH_HERE
Now you can develop using either tool
This isn’t required for your MVP.
But once your app grows beyond the basics, having Claude Code in your toolkit will save you hours of frustration.
This is primarily what I use now.
The Replit agent got me started fast, but Claude Code is what keeps the app evolving as requirements get more complex.
Your action: Start with Replit’s agent. Once you’re comfortable and need more power, add Claude Code to your workflow.
Step 3: Build Your AI Knowledge Base
This is where most people screw up.
They connect their app to a generic AI and wonder why the responses are mediocre.
Your AI needs domain-specific knowledge.
I used Poppy AI for this, but you could use:
Custom GPTs with file uploads
Claude Projects with knowledge bases
Pinecone or other vector databases
Any tool that lets you train AI on specific content
Here’s my process:
1. I downloaded all our course content
Every module. Every document. Every piece of internal knowledge that would help the AI give better answers.
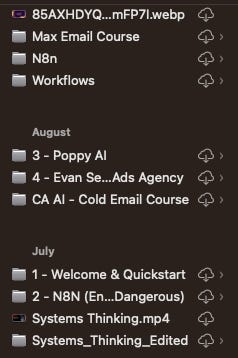
2. I created separate Poppy boards for each module
One board for Offer Creation. One for VSL Writing. One for Cold Emails.
Each board got the relevant course content uploaded to it.

3. I used AI to write its own system prompt
This is the clever part.
In each Poppy board, I created a chat with access to all the uploaded knowledge. Then I said:
“Using the X training in your knowledgebase, help me craft a hyper detailed AI prompt that will always work for PURPOSE following the structure in the videos.”
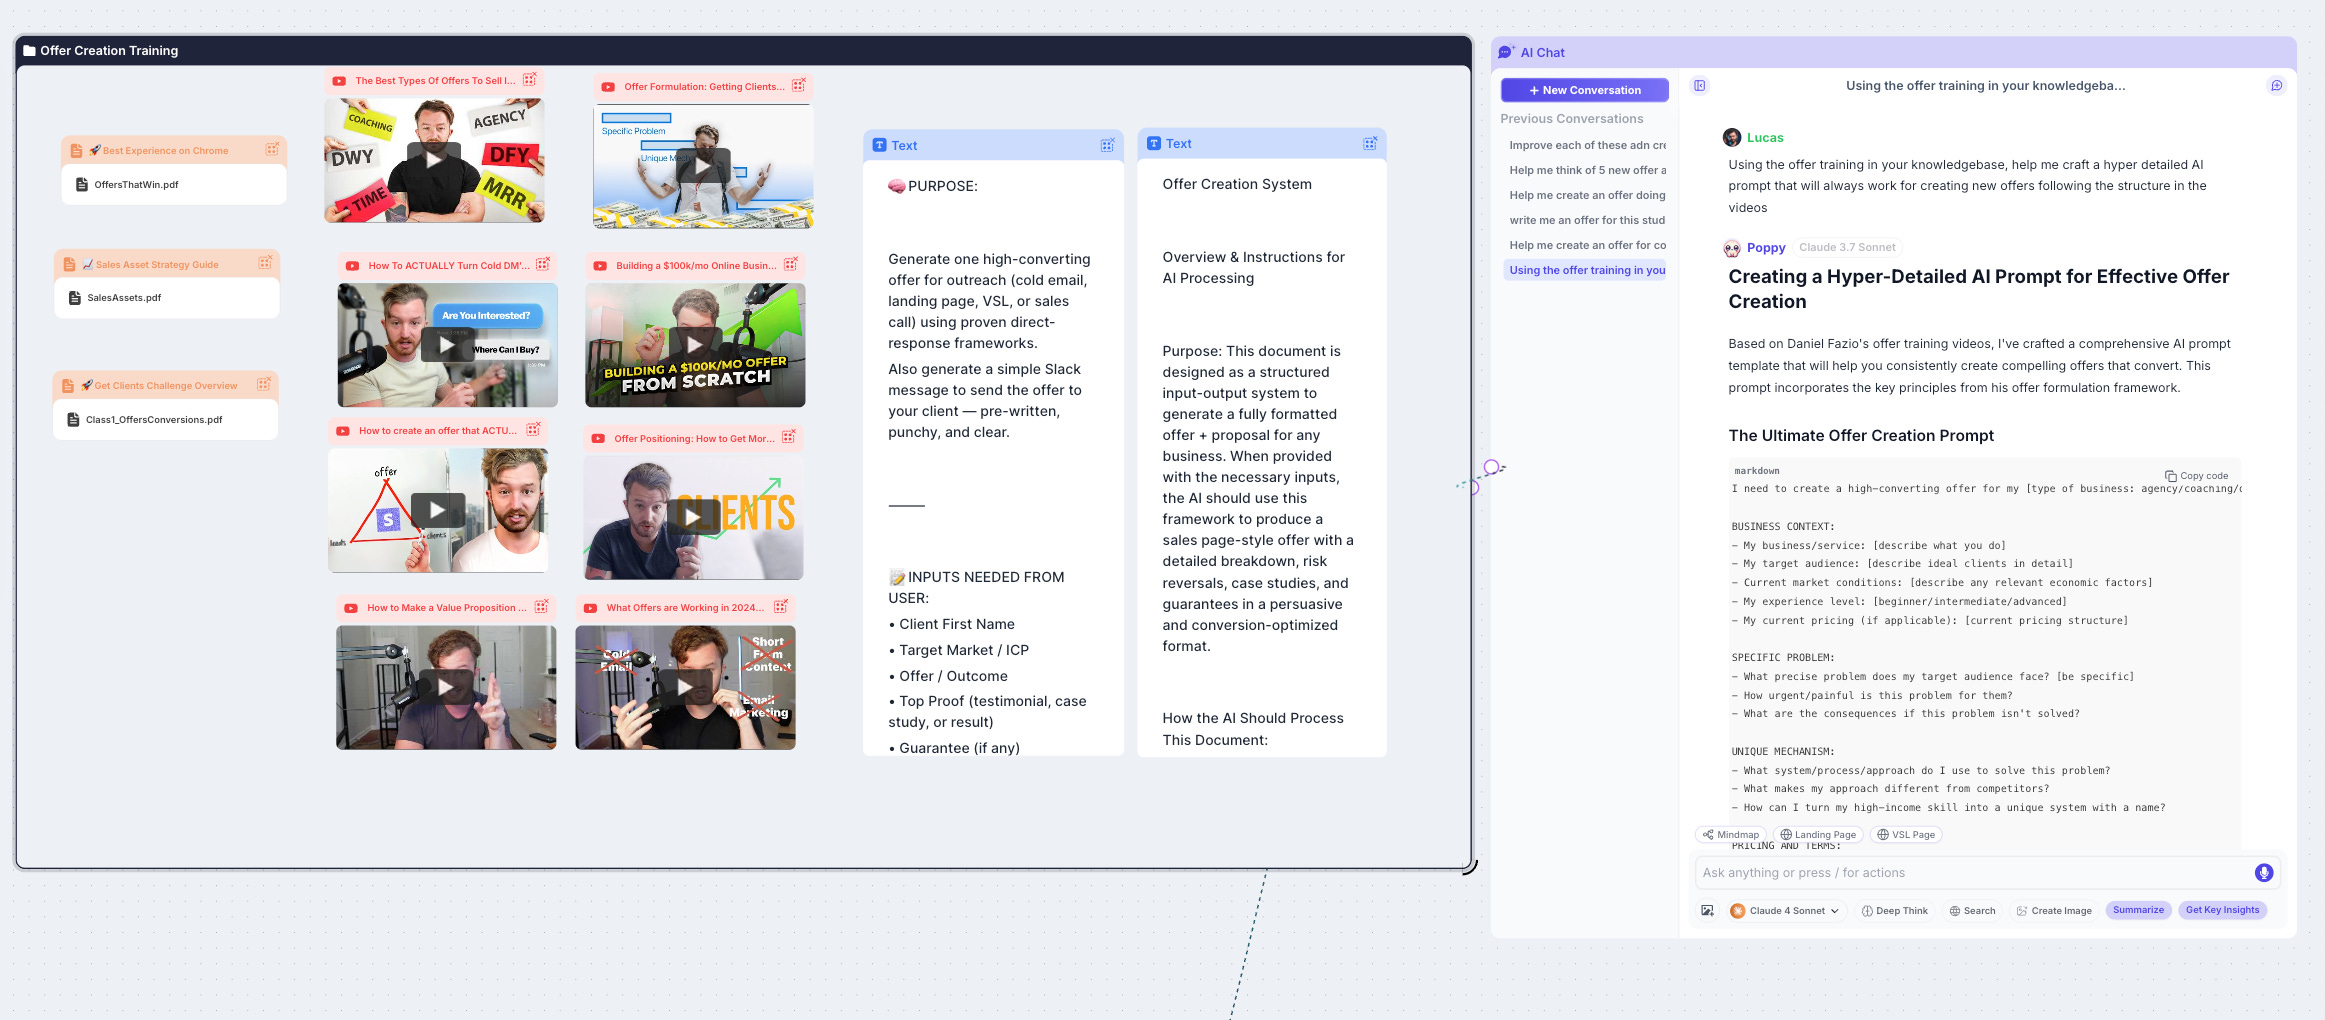
The AI wrote its own instructions based on the training material.
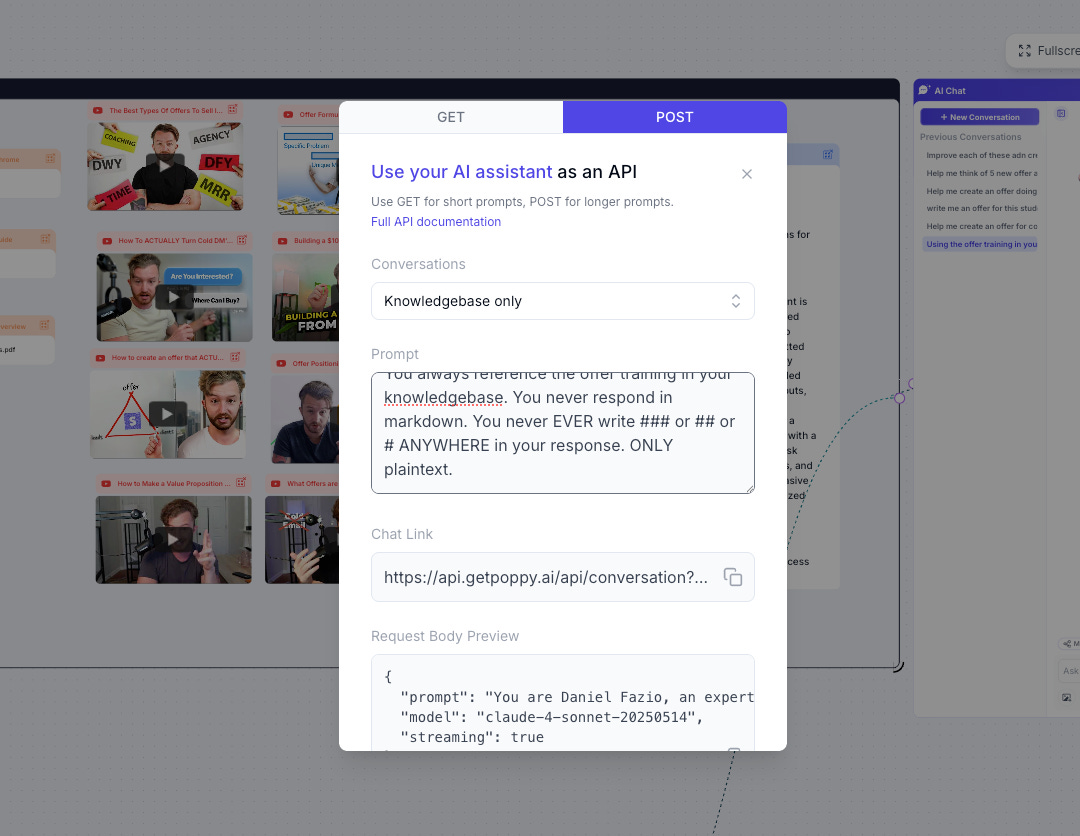
4. I set that prompt as the system prompt using the Poppy API
Poppy has a developer plan that gives you API access. I used the API to set the AI-generated prompt as the actual system prompt for each module.
Your action: Gather all the knowledge your AI needs. Upload it to your chosen platform. Create specialized modules for each major task.
Step 4: Connect Your AI to Your App
Now you’ve got:
An app interface (Replit)
AI modules with domain knowledge (Poppy)
Time to connect them.
I used webhooks.
In Replit, when a user sends a message, the app makes a POST request to the Poppy API with:
The user’s message
The conversation history
Which module they’re using
Poppy processes it and sends back the response.
The Replit app receives the response and displays it to the user.
I used Poppy before I knew how to set up custom vector stores using Supabase and N8N.
I’ll be explaining how to do that in another newsletter.
Your action: Set up the connection between your app and your AI. Test it with a simple message to make sure data flows both ways.
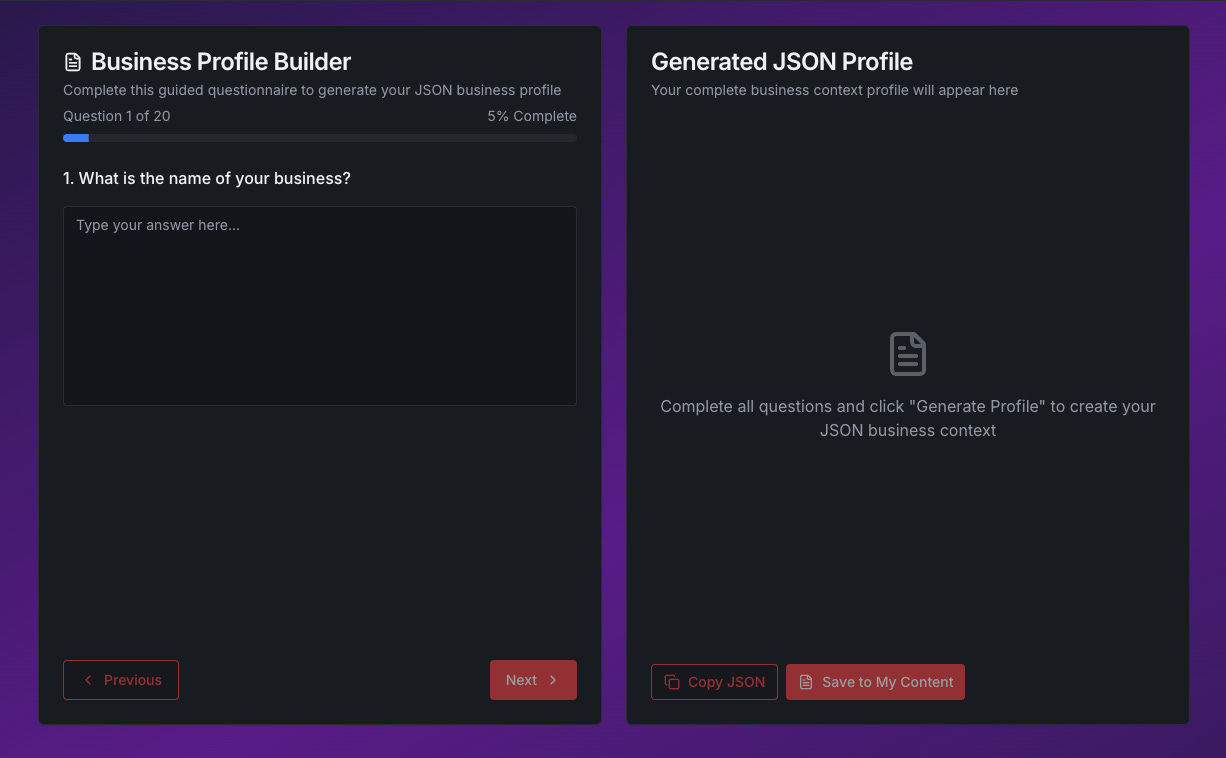
Step 5: Build the JSON Context Builder
Here’s a problem you’ll hit immediately:
Users jumping between different AI modules will have to explain who they are and what they do every single time.
Annoying as hell.
Solution: A context builder that users fill out once.
I used ChatGPT to figure out what questions users needed to answer:
What’s your niche?
Who’s your target audience?
What’s your offer?
What’s your unique positioning?
What results do you deliver?
About 20 questions total.
Users fill out the form once. The app sends all that data to a dedicated Poppy chat that’s trained to create JSON context prompts.
Users save that JSON to their content library.
Now they can copy and paste it into any AI chat to give instant context without retyping everything.
The JSON looks something like this:
{
  “business_context”: {
    “niche”: “AI automation for agencies”,
    “target_audience”: “Agency owners doing $10k-50k/month”,
    “primary_offer”: “Done-for-you AI workflows”,
    “unique_positioning”: “We only work with agencies, not general businesses”,
    “results_delivered”: “Save 20+ hours/week on repetitive tasks”
  }
}
Your action: Create a form that captures the essential context your AI needs. Build a simple converter that formats it consistently.
Step 6: Add a Content Library
Users will generate a lot of outputs.
They need somewhere to save them.
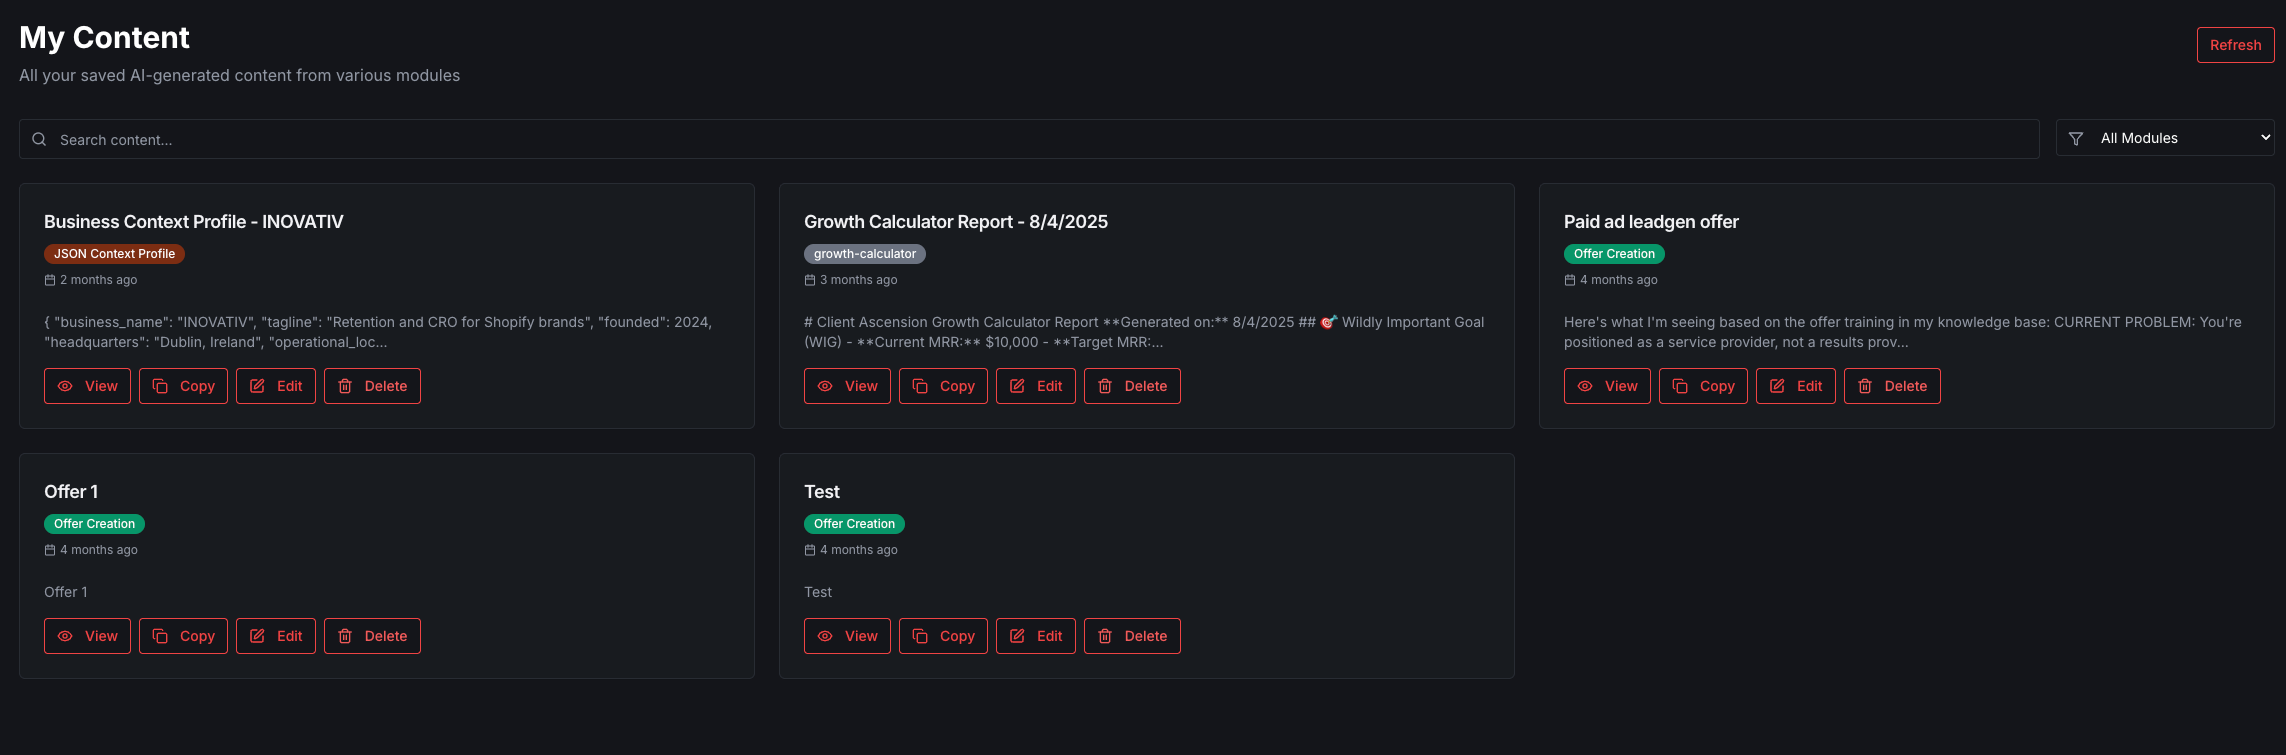
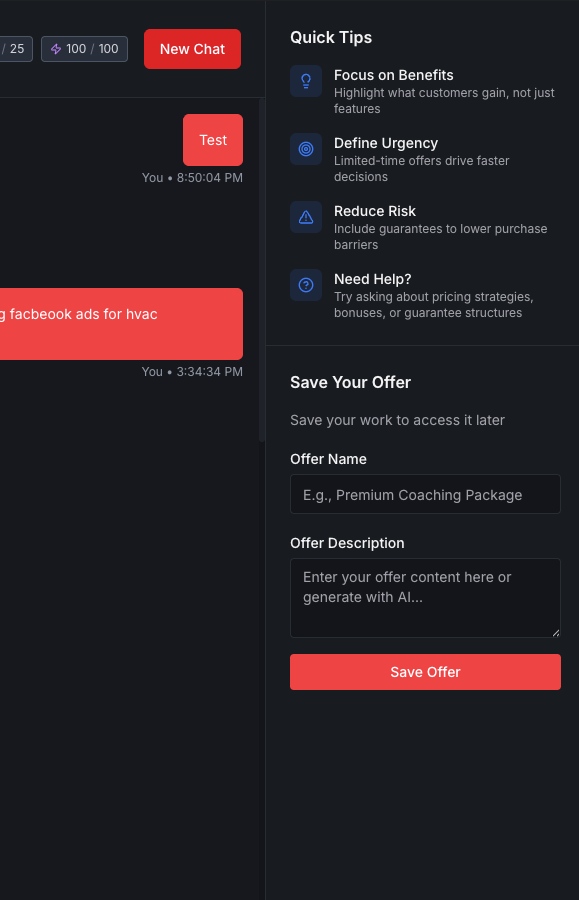
I built a simple content library where users can:
Take any AI response
Paste it into a sidebar text box
Click “Save to My Content”
Access all saved content later in a dedicated section
This is just basic CRUD functionality:
Create: Save new content
Read: View saved content
Update: Edit existing saves
Delete: Remove old content
Nothing fancy. Just functional.
Your action: Add a way for users to save and organize their AI outputs. A simple database table with user_id, content, timestamp, and module_id is enough.
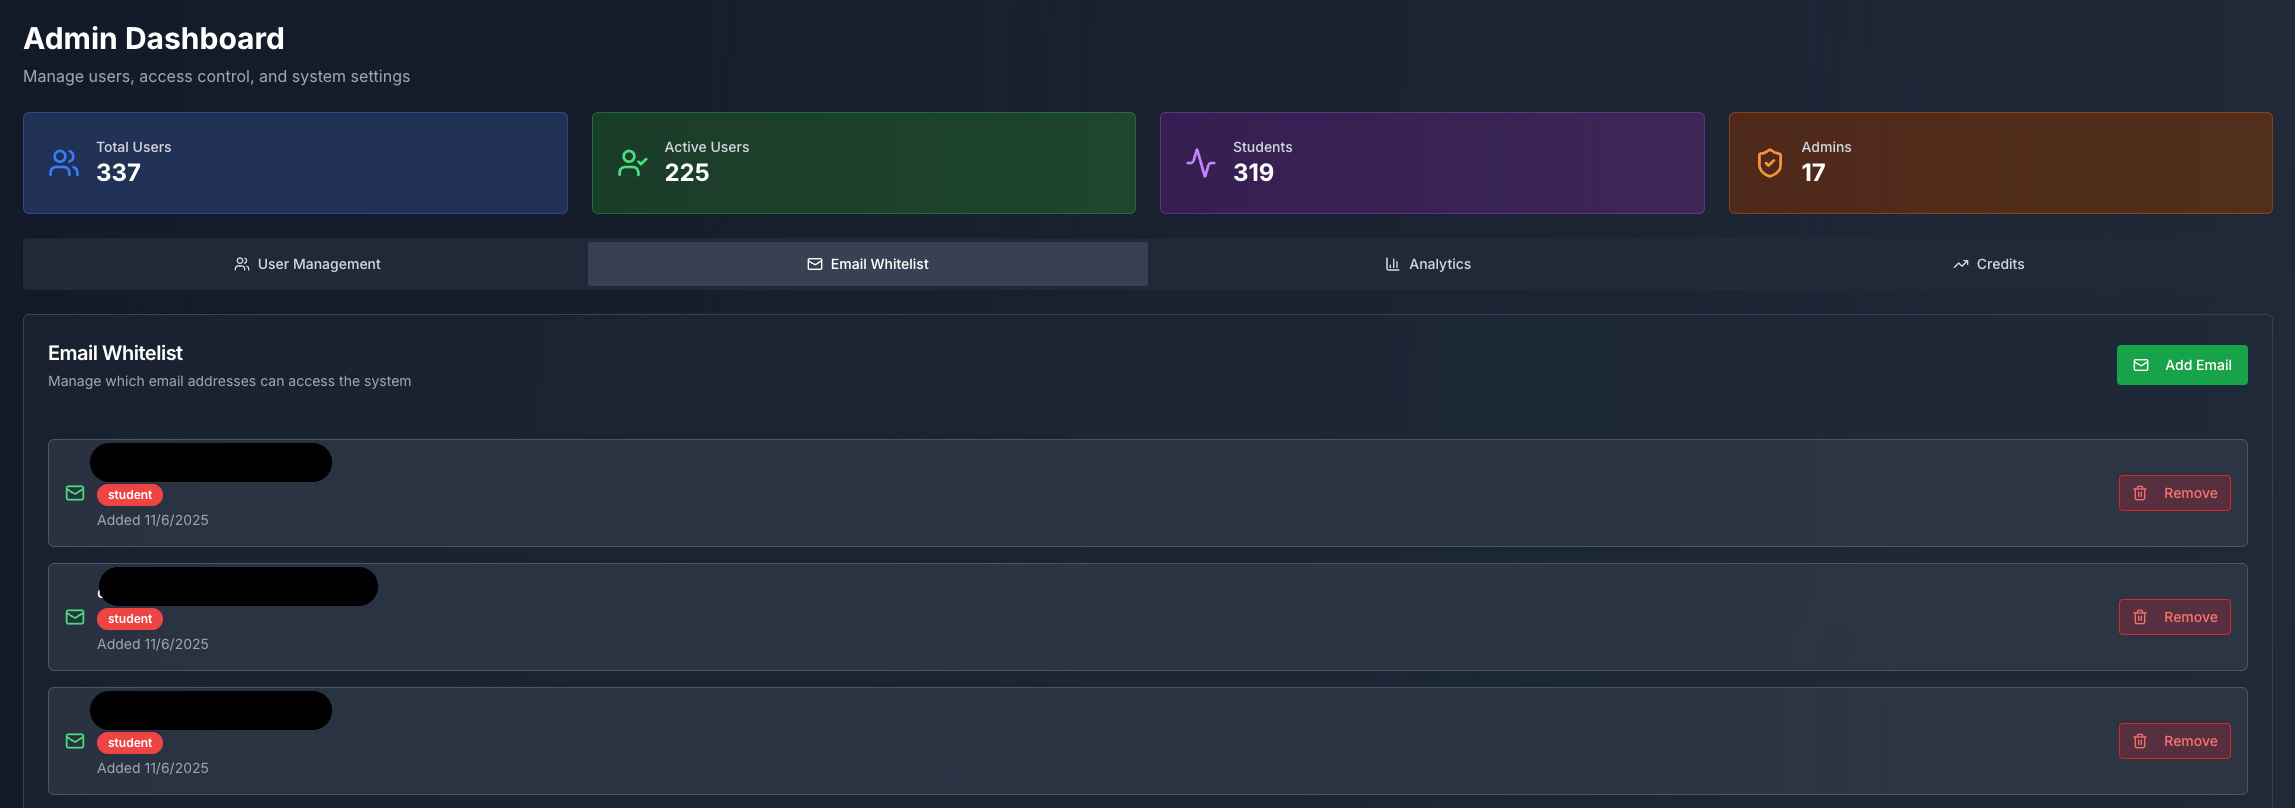
Step 7: Set Up Authentication
You need to control who can access your dashboard.
I used Replit Auth because it’s built-in and simple.
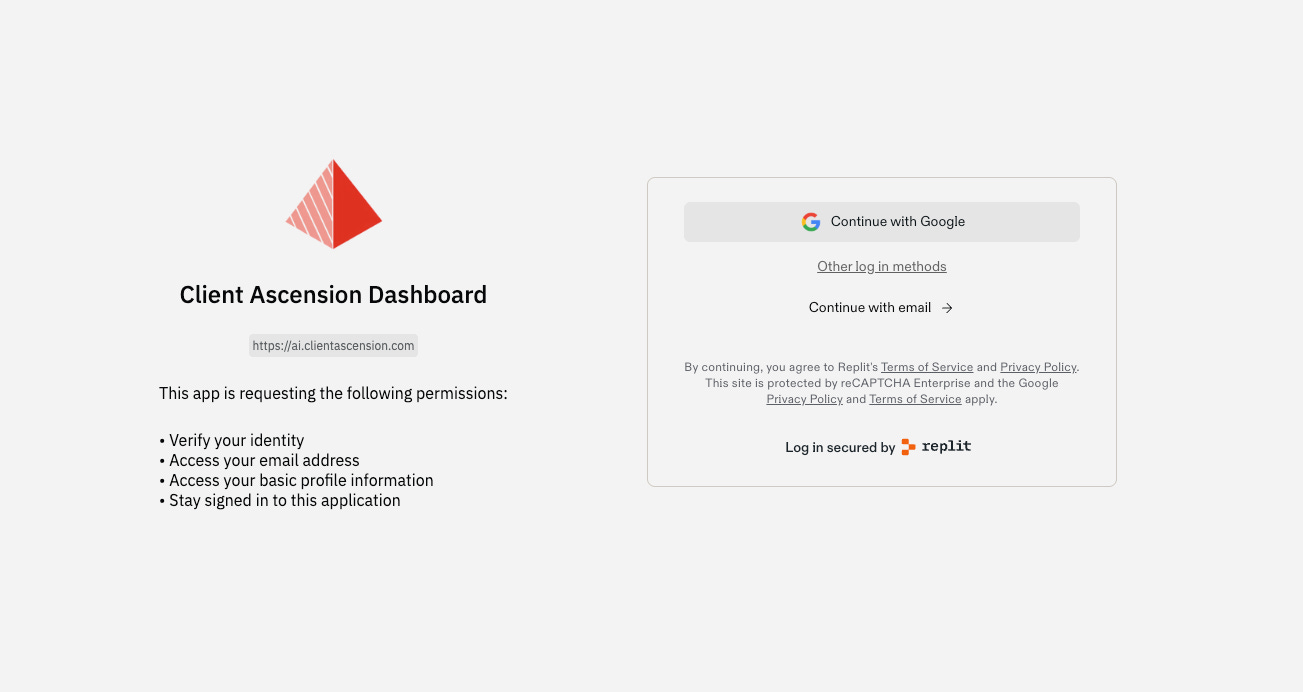
Here’s how it works:
1. Users sign up for a Replit account
2. They click “Sign in with Google” on your app
3. The app checks if their email is on the whitelist
I maintain a simple database table with approved email addresses.
I set all of this up by simply telling the Replit agent what I wanted to do.
“Create and implement a login system using Replit auth”
“Create an email whitelist system so only approved users can log in”
Automating the whitelist:
I’m currently working on automating this with Slack webhooks.
When a user joins our Slack and their profile is activated, their email gets automatically added to the whitelist.
When they’re deactivated, it gets removed.
Your action: Implement whatever auth system makes sense for your use case. Email/password, OAuth, magic links - pick one and implement it.
Step 8: Polish the UI
Once the core functionality works, make it not look like garbage.
I focused on:
Clean typography
Consistent spacing
Clear visual hierarchy
Mobile responsiveness (basic)
Intuitive navigation
You don’t need to be a designer. Just follow basic principles:
Use a simple color scheme (2-3 colors max)
Stick to 2 fonts maximum
Add plenty of whitespace
Make buttons obvious
Keep it simple
Your action: Spend 1-2 hours cleaning up the visual design. Don’t obsess. Just make it presentable.
Step 9: Test With Real Users
I launched the dashboard to our students without telling them it might break.
It didn’t break.
The only issues were:
Some confusion about the Replit auth process (solved with a simple explainer video in our course and instructions on the landing page)
A minor scrolling issue in the chat window (fixed in 10 minutes with Claude Code)
Your testing checklist:
Can users sign up and log in?
Do all AI modules respond correctly?
Does the context builder work?
Can users save and retrieve content?
Does it work on mobile?
Are there any obvious bugs?
Get 5-10 people to actually use it.
Watch them use it if possible.
You’ll find problems you never considered.
Your action: Launch to a small group. Fix the obvious issues. Iterate quickly.
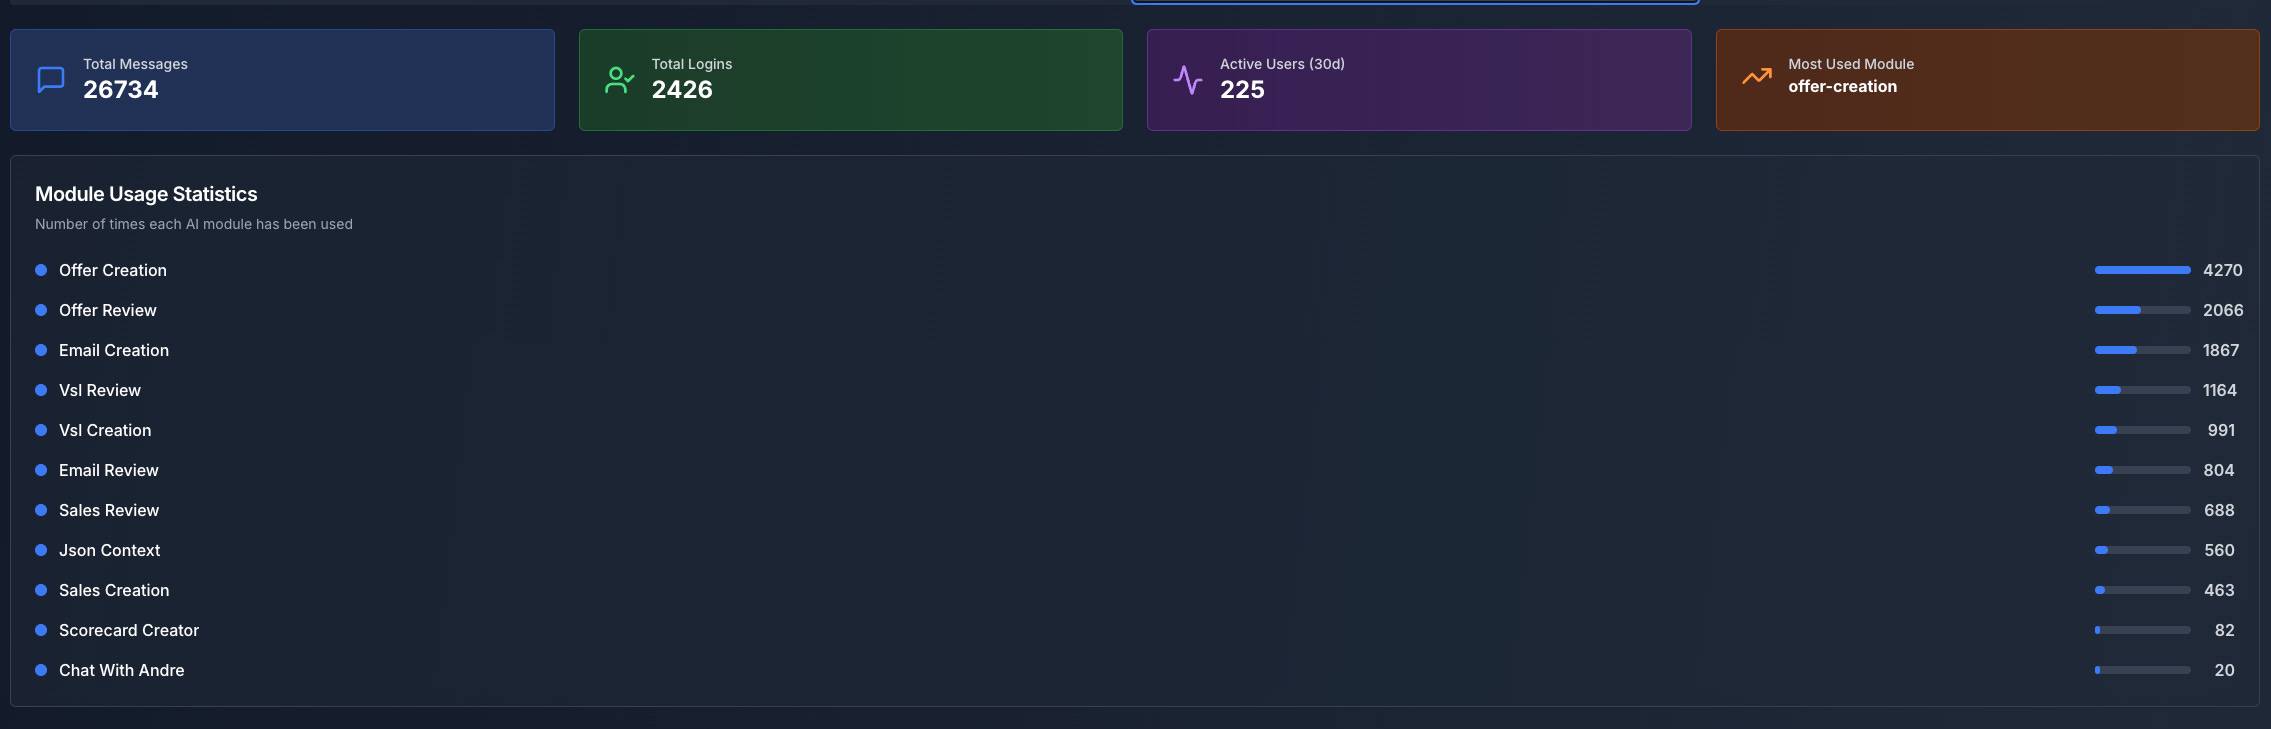
Step 10: Iterate Based on Usage
After launch, I kept improving the dashboard based on what students actually used.
Some modules got used constantly. Others barely at all.
I added:
More AI modules for common requests
Better formatting for AI outputs
Keyboard shortcuts for power users
Export functions for content
Admin dashboard for managing users
You don’t build everything at once.
You build the core.
Ship it.
See what people actually use.
Then make that part better.
This is where Claude Code really shines.
When users request complex features or you need to refactor parts of the codebase, Claude Code handles it better than any visual builder.
The Total Time Investment
Let’s be real about what this actually took:
Week 1:
Day 1: Defined deliverables, tested app builders (2 hours)
Day 2: Built initial Replit interface (1 hour)
Day 3: Set up Poppy boards and uploaded content (2 hours)
Day 4: Connected webhooks, tested first module (2 hours)
Day 5: Built remaining modules (2 hours)
Day 6: Added auth and content library (1 hour)
Total: ~10 hours of focused work
Not 10 hours per day.
10 hours total, spread across a week, working around other stuff.
That’s it.
After launch:
Ongoing improvements using Claude Code as the primary development tool
Adding complex features takes less time with Claude Code than continuing with visual builders
Debugging is faster because Claude Code can read the entire codebase
What You Need to Build This
Tools:
AI app builder (Replit, Bolt, Lovable - $0-20/month)
AI platform with API access (Poppy, OpenAI, Anthropic, N8N + Supabase - $20-100/month)
Your domain knowledge (the course content, documentation, or expertise you’re encoding)
Optional: Claude Code for advanced development ($20/month)
Skills:
Basic understanding of how APIs work
Ability to follow documentation
Willingness to test and iterate
Time:
10-20 hours for initial build
2-5 hours per week for improvements
Cost:
$50-150/month in tool subscriptions
That’s less than hiring someone on Upwork for a single day.
Common Mistakes to Avoid
1. Building too much before shipping
I shipped the MVP after a week.
It worked.
I improved it after real people used it.
Don’t spend months building features nobody asked for.
2. Using generic AI responses
If your AI isn’t trained on specific knowledge, it’ll give generic answers that users can get from ChatGPT.
The value is in the specialized knowledge.
3. Overcomplicating the interface
My dashboard is simple.
Chat on the left.
Modules in the middle.
Content library on the right.
That’s it.
No fancy animations.
No complex navigation.
Simple wins.
4. Not testing with real users early
I put this in front of students immediately.
They found issues I never would have caught.
Get real people using it fast.
5. Treating this like a coding project
This isn’t about writing elegant code.
It’s about solving a real problem for real people.
Use AI app builders.
Use no-code tools.
Use whatever gets you to working functionality fastest.
Then, when you need more control, level up to Claude Code.
6. Sticking with visual builders for complex features
Visual builders are great for MVPs.
But when your app needs sophisticated features, switching to Claude Code will save you hours of frustration.
I use Claude Code as my primary tool now.
The Replit agent got me started, but Claude Code keeps the app evolving.
What You Can Build With This Process
I built this for Client Ascension students.
But the same process works for:
Content creators:
Post generator
Script writer
Caption creator
Content calendar builder
Agencies:
Proposal generator
Client report builder
Strategy doc creator
Project brief writer
Consultants:
Framework builder
Audit report generator
Recommendation engine
Implementation roadmap creator
Coaches:
Assessment tool
Plan generator
Resource library
Progress tracker
The structure is the same.
Just swap out the modules and training content.
Your Next Steps
Today:
Write down 6-12 deliverables your users need
Pick 2-3 AI app builders to test
Gather the knowledge content you’ll use for training
This week:
Test app builders with your prompt
Build the basic interface
Create your first AI module
Test it with yourself
This month:
Build remaining modules
Add auth and content library
Launch to 5-10 beta users
Iterate based on feedback
If you need more power, set up Claude Code
You don’t need permission.
You don’t need to be a developer.
You don’t need a massive budget.
You just need to start.
The tools exist.
The process works.
The only question is whether you’ll actually build it.
Stop planning.
Stop waiting for the perfect moment.
Open your notebook.
Write down your deliverables.
Pick an app builder.
Make something.